In this lesson you'll learn how patterns can be reversed using the Flip command and how mirror images of patterns can be created using the Reflect command. You'll also learn how to make several copies of a pattern using the Repeat command.
Many stained glass windows have symmetric patterns, and the Flip and Reflect commands are here to support such designs.
 To flip a design is to turn it into its mirror image, either by inverting it left to right (called a "horizontal" flip) or top to bottom
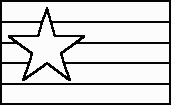
(called a "vertical" flip). Let's try some flips on the flag design that we used in Lesson 9 when we experimented with color. Load the "Flag" file now.
To flip a design is to turn it into its mirror image, either by inverting it left to right (called a "horizontal" flip) or top to bottom
(called a "vertical" flip). Let's try some flips on the flag design that we used in Lesson 9 when we experimented with color. Load the "Flag" file now.
![]() Just for fun, turn color off for this lesson since we won't be using it. (Do so by clicking the Show Colors toolbar button.) You should also Zoom Out a
couple of times so that the design occupies only a small part of the view.
Just for fun, turn color off for this lesson since we won't be using it. (Do so by clicking the Show Colors toolbar button.) You should also Zoom Out a
couple of times so that the design occupies only a small part of the view.
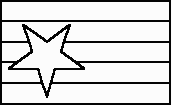
Choose "Flip All" from the shortcut menu. Notice that a second pop-up menu appears, asking you whether you want to flip horizontally or
vertically. Choose "Vertically." The design will be flipped top to bottom.
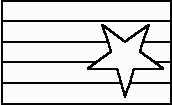
Do another flip, but this time flip horizontally.
Click the Undo button twice to restore the flag to its original orientation.
Reflecting is a way to make a mirror image copy of a design. Reflecting is always done across crosshairs, so you must have the crosshairs visible whenever you want to use this command.
![]()
 Let's first use the horizontal/vertical crosshairs for reflecting. Make those crosshairs visible by clicking the Show Crosshairs toolbar button. Position
the crosshairs origin (the point where the crosshairs intersect) just under and to the right of the flag. (If the button is pressed in and you don't see
the crosshairs, choose "Set Crosshairs Origin" from the View menu.) Your view should now look something like this.
Let's first use the horizontal/vertical crosshairs for reflecting. Make those crosshairs visible by clicking the Show Crosshairs toolbar button. Position
the crosshairs origin (the point where the crosshairs intersect) just under and to the right of the flag. (If the button is pressed in and you don't see
the crosshairs, choose "Set Crosshairs Origin" from the View menu.) Your view should now look something like this.
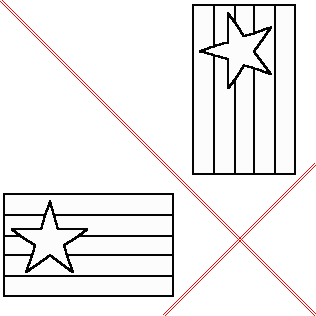
Choose "Reflect All" from the Modify menu. A second menu will appear asking you to choose between three kinds of reflections:
Choose the first item to reflect the design across the vertical crosshair. Your view should now look like this:

If you have clicked nothing else, the flag to the left of the vertical crosshair should still be selected. (If it isn't, make it so.) Choose "Reflect All" from the Modify menu, and this time choose the second item from the menu to reflect across the horizontal crosshair, which will make a flag below the selected flag. Finally, do another reflection that reflects across both crosshairs.
Click the Undo button three times to return to a solitary flag.
![]()
Now click on the Show Crosshairs button that brings up the diagonal crosshairs.
Position those crosshairs to the right of the flag.
Select the entire flag, and then again choose "Reflect All" from the shortcut menu. Because you now show the diagonal crosshairs, you see a slightly different second menu:
Choose the first item. Your view should now look like this:
Continue your experimentation by choosing the other two reflection methods, just as you did with the horizontal/vertical crosshairs.
If you want more than one copy of a design, you'll find the Repeat command useful. With this command you repeat your design, or a portion thereof, at regular intervals. There are three repeat patterns available:
Let's try each of these in turn. Start by clicking the Undo button until you return to a solitary flag. Now use the "Repeat All" command on the Modify menu. (If you have the Standard Edition then you'll see a message informing you of your upgrade options; click "Proceed" to continue.) Select the "Linear" tab and specify 3 repetitions along a 45° angle spaced 15" apart. Click OK, and then do a "Zoom All" to see the result, which should look like this:

Your original flag is included as one of the repetitions.
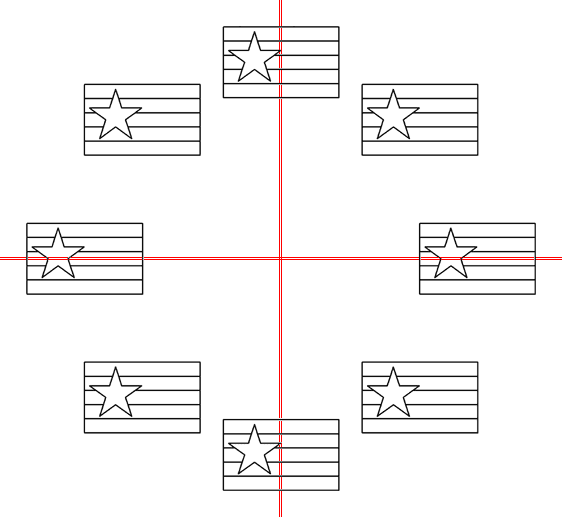
Click Undo and let's try another one. Before doing so, use the Set Crosshairs Origin command and set the origin of the horizontal/vertical crosshairs to somewhere around 16" to the left of the flag. (Turn on the rulers if you need to.) Now use the "Repeat All" command again and select the "Circular" tab. Choose 8 repetitions with "petal" orientation. Petal orientation will rotate your design as it copies it around the crosshairs origin, making a pattern like the petals of a flower. Your result should look like this:

Click Undo and try again, this time with "clock" orientation. With this option the design is not rotated, just as you see with the numbers on a clock face:
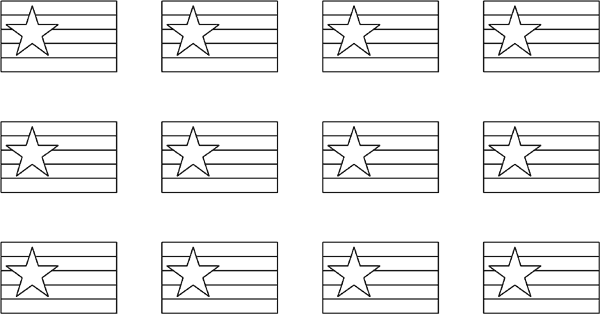
Lastly, click Undo and try "Repeat All" once more and select the "Rectangular" tab. Choose 4 columns, 3 rows, a column offset of 20" and a row offset of 15". The result should be an array of flags:
When you're finished, close this design without saving your changes.
Next Lesson: Lamp Wizard and More