Design of the Month · November 2005
-
"Shine a Light"
"Find a dark place, and go shine a light on it." – Rev. Abe Cox
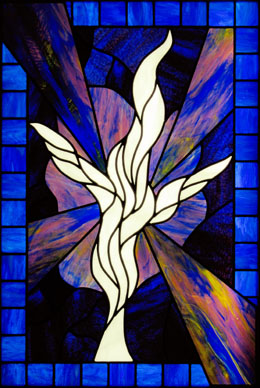
This simple quote is the inspiration behind my latest piece. It is on display in the Rev. Abe Cox Memorial Chapel in the Apistodookee United Methodist Church on the Blackfeet Indian Reservation in Heart Butte, Montana.
I have always preferred to doodle when working out the "feel" of a particular idea. I do a lot of ideas at a very small scale, usually just a couple of inches in size. This allows me to be more fluid, and work the lines in shorter strokes, without getting too bogged down in the details. After I have achieved the feel I want, all I have to do is scan it and import the doodle into Glass Eye 2000. I don't have to worry about having the size perfect because I can adjust dimensions at any time inside Glass Eye 2000.
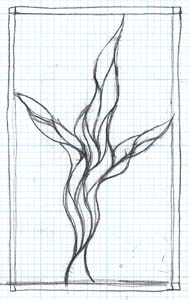
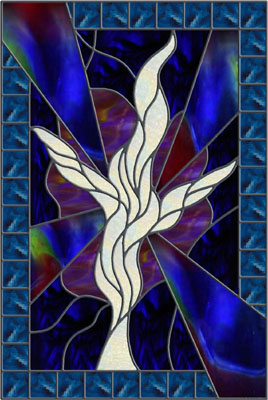
After importing and tracing the doodle I experimented with various background concepts. I wanted to capture the feel of a beautiful "purity of light" coming out of a murky darkness. The main figure can be interpreted as a cross, or a person, or a flame. Any of these interpretations is appropriate.
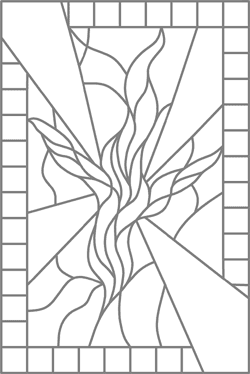
Adding borders to the design was simple using the Subdivide function, where I could try various sized segments until I got something that felt right. This "feel" is something that comes with practice, but the program allows for a lot of experimentation, or creativity, in a short period of time.
Once I settled on a design, I was able to take it a step further. You can export a design from Glass Eye 2000 and get a very good rendering of the final piece. But I wanted to get more realism on the line work, and was able to accomplish this using a combination of Glass Eye 2000 and Adobe Photoshop 8.0. Here's how I did it.
First, I exported the design from Glass Eye 2000. I used a fairly high resolution so that the final image would look more photographic. You can adjust resolution on the export window.
Then, I turned off all the color samples using the Show Colors command in Glass Eye 2000. This left me with just the lines with all the pieces filled with white.
Next, I opened both images in Photoshop and dragged the "Lines" image on top of the first image. Since they were exported at the same settings, they were exactly the same size.
Now I adjusted the top "Lines" layer. I selected all the white areas using the magic wand. I selected one section and then used "Select – Similar" to select all white areas. Then I created a "Mask" from this selection using the "Layer – Add Layer Mask" function. It sounds complicated, but it's like brain surgery: easy once you know how.
What I then had was an image that looked like my original export from Glass Eye 2000. The difference was that I could then add effects to the "Lines" separately from the "Background". I used the "Layer style" function to create a "Bevel" line for the top layer. I played around with the settings until I got the effect I was after.
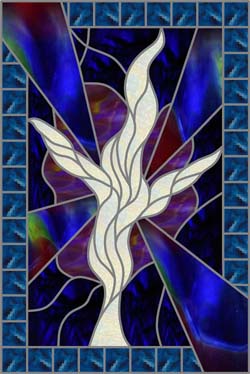
The finished Photoshop image appears at the top of this article. I also have a higher resolution version. Below is a photograph of the completed window:
I covered a lot of ground in very loose terms here. You may contact me by email and I'd be happy to walk you through the steps in more detail.
~ Russell Shuler
About the artistRussell Shuler is Vice President, Chief Creative Officer at Elberson Partners, an advertising agency in Charlotte, North Carolina. He has worked as an art director for over 23 years, the last 14 years on computers. He has a Bachelor of Fine Arts degree in drawing from the University of South Carolina.
Russell has been working in stained glass for a little over two and a half years, and has started a small business called Light-Crafts. While relatively new to the business of stained glass, his love of stained glass has been lifelong.
You may contact Russell at design@light-crafts.com.
This pattern may be used to make one or more artworks for sale or personal enjoyment. This pattern may be printed for personal use only and may not be sold or given away in printed or electronic form.
Each month we feature a project designed using Glass Eye 2000. Do you have a project to share with the world? Contact Dragonfly Software and your creation might be our next Design of the Month.